
How to Prep Your Home for a Painter: A Guide to Getting a Better Quote and a Flawless Finish
Prepping your home for a painter saves you money and ensures a better result. Our guide shows you what to do before the pros arrive for a smoother project and a more accurate quote.
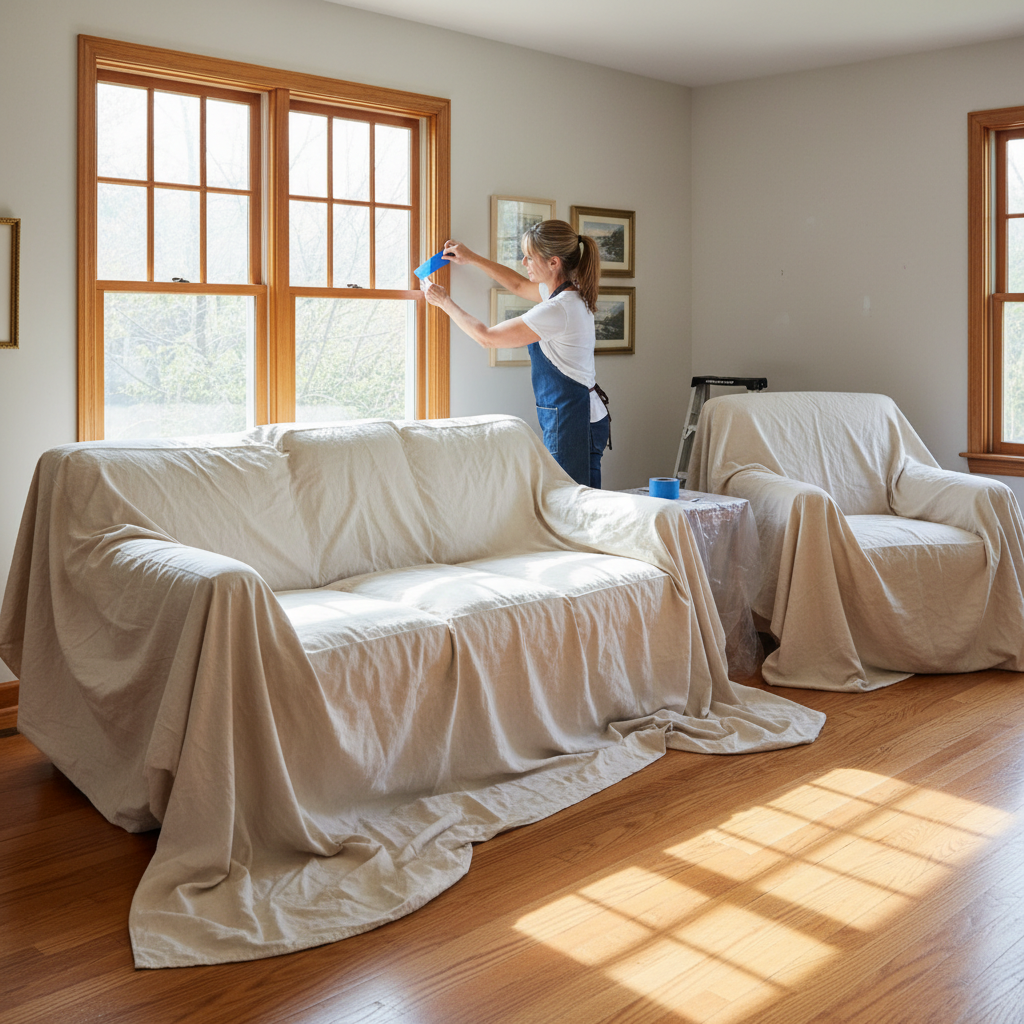
Hiring a professional painter is one of the fastest ways to completely transform a space. But before you pick up the phone to schedule estimates, there's a crucial step that many homeowners overlook: preparation. What you do before the painter arrives has a massive impact on the quality of your quote, the smoothness of the project, and the durability of the final finish.
Think of it this way: painters quote a job based on two main things—materials and labor. While the cost of paint is relatively fixed, the labor hours can vary significantly. Every task you handle yourself, from moving a sofa to patching a nail hole, is one less task you have to pay a professional hourly rate for.
This guide will walk you through exactly how to prep your home for both interior and exterior painting. We'll cover what's worth doing yourself, what's best left to the pros, and how to use your prep work to get a clearer, more accurate, and often lower, quote.
Why Bother Prepping? The Impact on Your Quote and Final Finish
It can be tempting to think, "I'm paying a pro, so they should do everything." While that's technically true—most painters offer a full-service option that includes all prep—it's not the most cost-effective approach. Taking on some of the simple prep work yourself directly translates into savings and a better outcome.
A More Accurate Quote: When a painter walks into a cluttered room, they have to guess how long it will take to move everything and prepare the surfaces. This uncertainty often leads them to build a buffer into their quote to cover potential unknowns. A clean, decluttered space allows them to see exactly what they're dealing with—the condition of the walls, the trim, and the ceiling—and provide a precise, competitive quote without the extra padding.
Lower Labor Costs: The most significant savings come from reducing the painter's labor time. Moving furniture, taking down wall hangings, and removing outlet covers are simple but time-consuming tasks. A painter might charge anywhere from $50 to $100 per hour for this work. If you can save their crew 3-4 hours of prep time, you could easily save several hundred dollars on a typical multi-room project.
A Better, Longer-Lasting Finish: Prep isn't just about saving money; it's about quality. Paint needs a clean, smooth, and dry surface to adhere properly. Dust, grease, and grime prevent the paint from forming a strong bond, leading to premature chipping, peeling, and blistering. By ensuring the walls are clean and in good repair, you're helping the painter achieve a flawless, durable finish that will look great for years, not months. You can expect a good interior paint job to last 5–10 years, and proper prep is key to hitting the high end of that range.
The Big Three: Decluttering, Cleaning, and Moving
This is the foundational work that any homeowner can do. It requires more elbow grease than skill, and it's the single biggest thing you can do to make a painter's job easier and your quote lower.
Decluttering Your Space
Your goal is to create a blank canvas. Every item on or near the walls needs to be moved.
- Small Items: Remove all knick-knacks, picture frames, clocks, and decorations from walls, shelves, and tabletops. Box them up and move them to a room that isn't being painted.
- Window Treatments: Take down curtains, drapes, blinds, and shades, along with their corresponding hardware (rods, brackets). Place screws and small hardware in a labeled plastic bag so you don't lose them.
- Electronics: Unplug and remove all electronics, such as TVs, speakers, and lamps.
Cleaning Surfaces
Painters will expect to do some final surface prep, but coming into a clean room versus a grimy one makes a huge difference. Paint sticks to walls, not to dust and grease.
For most rooms, a simple wipe-down with a damp cloth or a Swiffer-style duster is sufficient to remove cobwebs and dust. However, some rooms require more attention:
- Kitchens & Dining Areas: Years of cooking can leave a thin, almost invisible film of grease on walls. This is paint's worst enemy. Clean these walls with a solution of a TSP (trisodium phosphate) substitute or a degreasing cleaner like Dirtex. Follow the product instructions carefully.
- Bathrooms: High humidity can lead to mildew or soap scum buildup. Clean with a 1:3 bleach-to-water solution or a dedicated bathroom cleaner to kill any mildew before painting.
- Baseboards & Trim: These areas collect a surprising amount of dust. Run a damp rag over all trim, windowsills, and door frames.
Moving Furniture and Large Items
This is the heaviest lift, but it’s also a huge labor-saver. You have two options:
- DIY Move: If you're able, move all furniture out of the room completely. For heavy items you can't move out, push them all to the very center of the room. A good rule of thumb is to create at least a 3-foot-wide clear path around the entire perimeter. The painter will then cover the centralized pile with plastic or drop cloths.
- Pay the Painter: If you have extremely heavy furniture or are unable to move it yourself, painters will do it for you. Just be aware that this will be a specific line item on your estimate. When getting quotes, you can even ask for the price with and without furniture moving included to see exactly how much you'd be saving.
Surface Inspection and Minor Repairs: The "Should I Do This Myself?" Checklist
Once the walls are clear, you can inspect their condition. This is where you decide what to fix yourself and what to flag for the pro. Getting this right is key to a seamless finish.
Identifying Common Wall Imperfections
Take a slow walk around the room and look for small blemishes you can likely tackle yourself with a trip to the hardware store. These include:
- Small Nail & Screw Holes: Tiny holes from picture hangers are the easiest fix. Use a small amount of spackling paste, press it into the hole with a putty knife, and scrape it flush. It will dry quickly and can be lightly sanded smooth.
- Minor Dings & Dents: Small gouges in drywall from furniture bumps can be filled with spackle in the same way.
- Hairline Cracks: Very thin, non-structural cracks (often appearing around door frames) can sometimes be filled with a flexible, paintable caulk.
For any DIY repairs, make sure the patch is completely dry and sanded smooth before the painter arrives. A poorly done patch will be glaringly obvious under a fresh coat of paint.
When to Leave Repairs to the Pro
Be honest about your DIY skill level. A bad patch is worse than no patch at all. The following issues should almost always be left to your painting contractor, who has the experience and materials to do them right:
- Large Holes: Anything bigger than a US quarter.
- Significant Cracks: Long, wide, or recurring cracks can indicate underlying structural or settlement issues.
- Failing Drywall Tape: If you see bubbling or peeling lines where drywall sheets meet, the tape is failing and needs to be professionally re-taped and mudded.
- Water Damage Stains: A yellow or brown stain on a ceiling or wall is a red flag. The source of the leak must be fixed first. Then, the painter needs to seal the stain with a specialized primer (like a shellac-based or oil-based primer) before applying the topcoat. Regular latex paint will not cover it; the stain will bleed through.
- Widespread Peeling or Flaking Paint: This indicates an adhesion failure from a previous paint job and requires extensive scraping, sanding, and priming.
The Value of Pointing It Out
Whether you fix the small stuff or not, make a comprehensive list of every imperfection you find. For clarity, place a small piece of blue painter's tape next to each spot. During the estimate walk-through, show this to the contractor. This accomplishes two things: it ensures the cost of these repairs is included in the quote (preventing surprise charges), and it shows the contractor you're a detail-oriented homeowner who expects a high-quality job.
Your Role During the Estimate Walk-Through
Your prep work doesn't stop when the contractor shows up. How you communicate during the estimate process is just as important for getting an accurate quote.
Be Prepared to Discuss Your Project in Detail
Don't be vague. The more specifics you can provide, the more precise the quote will be.
- Paint Colors: Have your colors chosen. If you're undecided between a few, have the swatches ready. Changing colors after the quote is generated can change the price, especially if you're going from a very dark to a very light color (or vice versa), which may require more coats or a special primer.
- Sheen/Finish: Know what finish you want (e.g., flat/matte for ceilings, eggshell/satin for walls, semi-gloss for trim and doors). Different sheens have different price points and application requirements.
- Scope: Be crystal clear about what is and isn't included. Are they painting the walls only? Walls and ceiling? Walls, ceiling, and trim? What about doors? Window frames? The inside of closets? Define the scope explicitly.
Walk the Space with Each Contractor
Walk through the project area with every contractor providing a bid. Use the list of repairs you made and point out each area of concern. Tell them what prep work you plan to do yourself (e.g., "I will move all the furniture to the center and clean the walls."). This allows them to adjust their labor estimate downwards. You can even ask for an itemized quote to see the cost difference if they handle all prep versus you handling some.
Ask About Their Prep Process
This is how you compare apples to apples. A low bid might be a red flag if the contractor skimps on prep. Ask detailed questions:
- How will you protect my floors and furniture?
- What level of surface prep is included? Do you patch holes? Do you sand walls/trim?
- Do you clean the walls before painting?
- What brand and specific line of paint do you plan to use? (e.g., Sherwin-Williams 'SuperPaint' or Benjamin Moore 'Regal Select' are common mid-to-high-end choices).
- How many coats of paint are included in the quote?
Prepping for Exterior Painting: A Different Ballgame
Exterior prep is more intense and often involves specialized equipment like pressure washers and tall ladders, so most of it is best left to the pros. However, there are still crucial things a homeowner can do to streamline the project.
Clearing the Perimeter
Your painter needs unimpeded access to every wall. Their crew will be moving ladders, scaffolding, and spray rigs.
- Landscaping: Trim back any trees, bushes, or shrubs so there is at least 18-24 inches of clearance between the foliage and the house siding.
- Outdoor Items: Move all patio furniture, grills, potted plants, yard decor, toys, and hoses well away from the house.
- Wall Fixtures: Remove smaller items like house numbers, thermometers, and decorative flags. Discuss larger items like light fixtures and security cameras with your contractor; they typically prefer to remove and reinstall these themselves.
Surface Cleaning and Inspection
While the painting crew will almost certainly pressure wash the entire exterior as their first step, you can perform a valuable pre-inspection. Walk around your house and look for:
- Rotting Wood: Pay close attention to wood trim, corner boards, fascia, and window sills. Poke suspect areas with a screwdriver. If it's soft and spongy, it's rotted and needs to be replaced, not just painted over.
- Cracked or Failing Caulk: Look at the seams around windows, doors, and where different materials meet. Dried-out, cracked caulk allows water to get behind your siding and needs to be removed and replaced.
- Peeling Paint: Make a note of any areas with significant peeling. This helps the painter estimate how much scraping and sanding will be required.
Flagging these issues beforehand ensures they are properly addressed in the contract.
Access and Logistics
Simple communication prevents headaches. Make sure outdoor water spigots are working and accessible for the pressure washer. Ensure all gates are unlocked. Inform the crew about the location of any underground sprinkler heads near the foundation. And if you have pets, make a plan to keep them safely indoors during the project.
Putting It All Together: Your Pre-Painting Checklist
Use this checklist to get your home ready for the painters and ensure you get the best possible quote and result.
Interior Prep Checklist
- Choose paint color(s) and sheen(s).
- Remove all art, photos, and wall decor.
- Take down all curtains, blinds, and associated hardware.
- Unscrew and remove all electrical outlet and light switch faceplates (place screws in a baggie taped to the plate).
- Declutter all surfaces and remove small furniture/lamps from the room.
- Move heavy furniture to the center of the room, at least 3 feet from walls.
- Thoroughly clean walls, especially in kitchens (degreaser) and bathrooms (mildew cleaner).
- Perform minor repairs (fill small nail holes) if you feel comfortable.
- Mark larger repair spots with blue painter's tape for discussion with the contractor.
- Make a plan to keep children and pets away from the work area.
Exterior Prep Checklist
- Trim landscaping to create at least 18-24 inches of clearance from the house.
- Clear the entire perimeter of patio furniture, grills, planters, hoses, and toys.
- Walk the exterior and make a list of any rotted wood, damaged siding, or failed caulk to discuss with the contractor.
- Ensure contractors have clear access through gates and to a working water spigot.
- Disable automatic sprinkler systems for the duration of the project.
- Inform the contractor about pets or any other site-specific considerations.
By investing a few hours in preparation, you're not just helping your painter—you're making a smart investment in your home. You'll get a more transparent quote, save money on labor, and give the professionals the perfect canvas to deliver a beautiful, long-lasting paint job that you'll enjoy for years to come.
Frequently asked questions
Should I buy the paint myself to save money?+
It's usually better to let the painter supply the paint. Professionals get a significant discount (often 30-50%) that isn't available to homeowners, and they know exactly which products work best. While they may mark up the cost slightly, it's often still cheaper than retail, and it ensures the right type and amount of high-quality paint is used for the job.
Do I really need to clean the walls if the painter is coming?+
Yes, it's a great idea to do a basic cleaning. While most painters include light cleaning or wiping in their prep, any significant grime or grease removal will be added to your labor cost. A quick wipe-down by you ensures better paint adhesion and can save you money on the final bill.
How much money can I really save by doing the prep work myself?+
The savings can be substantial, depending on the scope. For a standard multi-room interior project, handling tasks like moving furniture, taking down curtains, and removing outlet covers could easily save you $300 to $600 in labor costs. The painter can then focus their time on the skilled work you're hiring them for.
Should I remove outlet covers and switch plates before the painter arrives?+
This is a great task for a homeowner to do, but it's best to ask the contractor during the estimate. Most painters appreciate it, as it saves them time. Just be sure to label the plates or tape the screws to them to make re-installation easy.
What should I do if I find a major issue like a water stain during my prep?+
Do not ignore it or ask the painter to just paint over it. A water stain is a symptom of a larger problem, like a roof or plumbing leak. The source of the moisture must be fixed first, then the stained area needs to be sealed with a special stain-blocking primer before it can be successfully painted.