
Why Sump Pumps Fail and What to Do About It: A Homeowner's Guide
A failed sump pump can lead to a flooded basement and costly repairs. Learn the common causes of failure, what to do immediately, and how to prevent it from happening again.
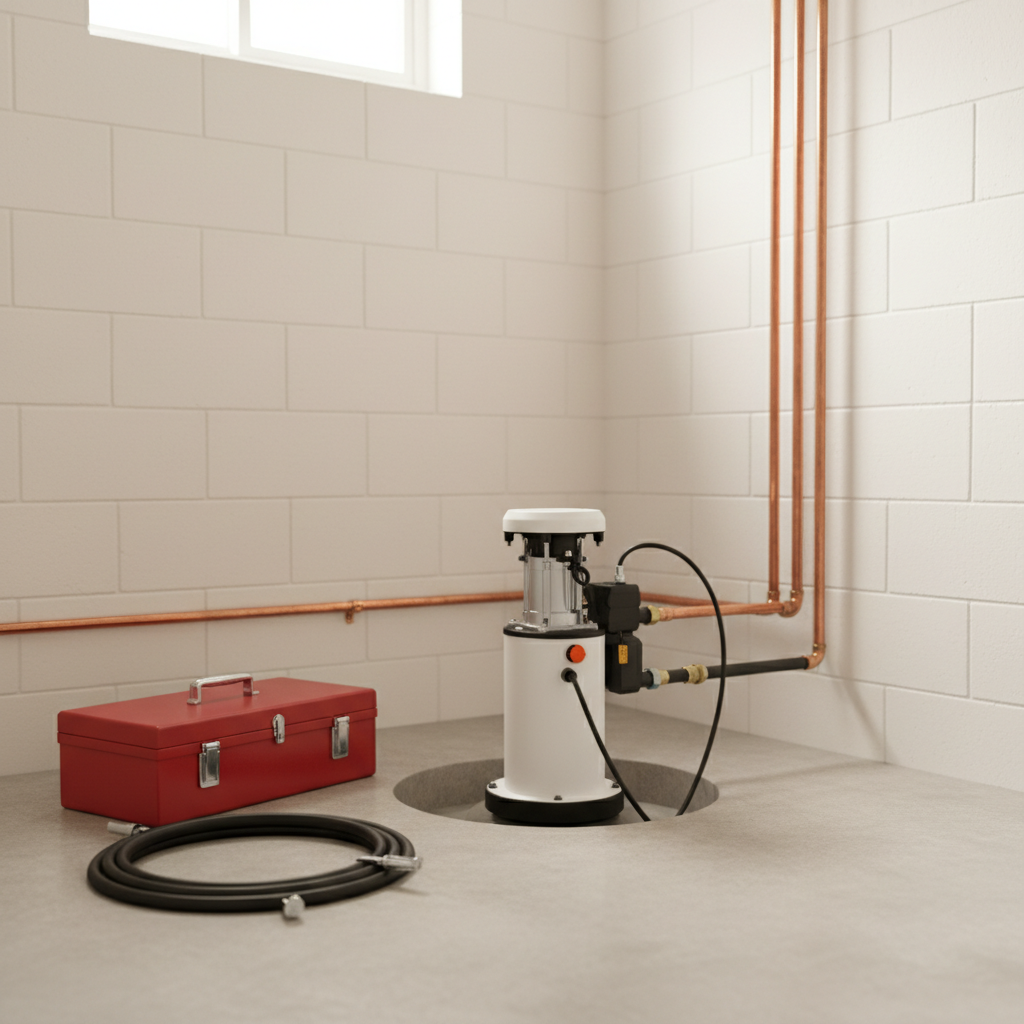
It’s one of a homeowner’s worst fears: descending the basement stairs to find inches of standing water. More often than not, the culprit behind this mess is a small, forgotten appliance in the corner—a failed sump pump. Your sump pump is the silent guardian of your basement or crawl space, and when it fails, the results can be catastrophic, leading to water damage, mold growth, and expensive repairs.
This guide will walk you through why sump pumps fail, what to do in the critical moments after a failure, and how to maintain and upgrade your system to prevent it from ever happening again. Understanding your sump pump is the first step toward keeping your basement dry and your peace of mind intact.
Understanding Your Sump Pump: The Unsung Hero of Your Basement
Before we dive into failures, let's quickly cover what a sump pump does. In its simplest form, a sump pump is a submersible pump installed in a constructed pit, or basin, in the lowest part of your basement or crawlspace. As groundwater levels rise (especially after heavy rain or snowmelt), the water is channeled into the basin. When the water reaches a certain level, the pump automatically kicks on and expels the water away from your home's foundation through a discharge pipe.
It's a simple, effective system that protects your foundation from hydrostatic pressure—the force of water pushing against it—which can cause cracks, leaks, and major structural damage over time.
The Key Components of a Sump Pump System
Every part of the system needs to work correctly for your basement to stay dry. A failure in any one of these components can lead to a flood.
- The Sump Pit (or Basin): The hole lined with gravel and concrete that collects the water.
- The Sump Pump: This can be a submersible model (which sits in the water) or a pedestal model (where the motor sits on a column above the water). It's the heart of the operation.
- The Float Switch: This is the brain. It's a switch that floats on the water's surface. As the water rises, the float lifts, triggering the pump to turn on. When the water level drops, the float lowers and shuts the pump off.
- The Check Valve: A one-way valve on the discharge pipe that prevents water from flowing back into the basin after the pump shuts off.
- The Discharge Pipe (or Effluent Line): The pipe that carries the water from the pump out of your house and away from the foundation.
When you call a plumber about a sump pump issue, being able to describe these parts can help them diagnose the problem faster. Knowing what a check valve is or describing how your float switch is behaving makes you a more informed homeowner.
The Most Common Causes of Sump Pump Failure
A sump pump can fail for many reasons, but most issues fall into a few common categories. Understanding these helps you troubleshoot and, more importantly, prevent them.
- Power Outages: This is the number one cause of pump failure during a storm—exactly when you need it most. Standard sump pumps run on your home's electricity. When the power goes out, the pump is useless unless you have a backup power source.
- A Stuck or Failed Float Switch: Because the float switch moves up and down constantly, it's a common failure point. It can get tangled, stuck against the side of the basin, or simply fail from wear and tear. If it's stuck in the 'off' position, the pump will never turn on. If it's stuck in the 'on' position, the motor will run continuously and burn out.
- An Overwhelmed Pump: Sometimes, the problem isn't a failure but a mismatch. If you have an undersized pump for the amount of water coming in (a common issue after a once-in-a-decade downpour or rapid snowmelt), it can't keep up. The basin will overflow even though the pump is running.
- Clogged or Frozen Discharge Pipe: The water has to have a clear path out. If the discharge pipe becomes clogged with dirt, debris, or ice, the water has nowhere to go. The pump will run, but the water will come right back into the pit, or the pressure will cause the motor to burn out.
- Lack of Maintenance & Old Age: Sump pumps are mechanical devices with a limited lifespan, typically 7 to 10 years. Over time, sediment and debris can build up in the pit, clogging the pump's intake screen. The motor can wear out, bearings can fail, and the impeller (the part that actually moves the water) can break.
Your Sump Pump Failed: An Immediate Action Plan
Discovering a flooded basement is stressful. Stay calm and act methodically to minimize the damage.
1. Safety First: Turn Off the Power. Water and electricity are a lethal combination. If you can safely reach your home's circuit breaker box without walking through water, shut off the power to the basement area. If you can't, call an electrician immediately. Do not enter standing water if the power is on.
2. Stop the Water (If Possible). If the flooding is from a burst pipe and not groundwater, find your home's main water shutoff valve and turn it off.
3. Remove the Water. The longer water sits, the more damage it causes. For small amounts, a wet/dry vacuum is your best friend. For significant flooding, you have two options: rent a high-capacity pump from a home improvement store or call a professional water damage restoration company. These companies have the equipment to extract large volumes of water quickly and have industrial-grade fans and dehumidifiers to dry the area properly, preventing mold growth.
4. Call a Plumber. Once the immediate danger is over and the water is being dealt with, call a licensed plumber. They can diagnose the pump failure, recommend a repair or replacement, and get your system back online.
DIY Fixes vs. Calling a Plumber: Knowing Your Limits
Some sump pump problems have simple solutions, while others require professional expertise. Knowing the difference can save you time, money, and a lot of frustration.
Quick Checks You Can Safely Do Yourself
Before you call for help, run through this checklist if it's safe to do so (i.e., the power is off or you are not in standing water).
- Is it plugged in? It sounds basic, but cords can be accidentally unplugged. Ensure it's plugged into a working ground-fault circuit interrupter (GFCI) outlet. Test the outlet with another device, like a lamp.
- Is the circuit breaker tripped? Check your breaker box and reset it if necessary. If it trips again immediately, you have an electrical problem—stop and call a pro.
- Is the float switch stuck? Look into the pit. Is the float tangled in the pump's electrical cord or stuck against the basin wall? Gently untangling it might be all it takes.
- Is the discharge pipe outlet blocked? Go outside and find where the pipe exits your home. Make sure it isn't covered by mulch, debris, or, in the winter, a block of ice.
When to Immediately Call a Professional Plumber
DIY is great, but don't risk your safety or a costlier repair. Call a plumber immediately if:
- You hear humming or buzzing from the pump, but it's not moving water. This often indicates a seized motor or a blockage that you can't see.
- The breaker trips repeatedly. This signals a serious electrical fault in the pump or wiring.
- You suspect the check valve has failed (you can hear water rushing back into the pit after the pump turns off).
- The pump is more than 7-10 years old. At this point, it's living on borrowed time, and a replacement is usually more cost-effective than a repair.
- You are not comfortable working with plumbing or electrical systems.
What this means for hiring: A good plumber won't just try to sell you the most expensive pump. They will diagnose the reason for the failure. If your old pump was undersized, they should explain why you need a more powerful model. If the discharge line is problematic, they should address that, not just replace the pump.
A Proactive Maintenance Plan to Prevent Flooding
An ounce of prevention is worth a hundred gallons of cure. A simple maintenance routine can drastically reduce the chances of a catastrophic failure.
Quarterly Check (DIY):
- Unplug the pump.
- Remove any visible debris (mud, gravel, leaves) from the pit.
- Plug the pump back in.
- Pour a 5-gallon bucket of water into the pit. The pump should kick on, drain the water quickly, and shut off. This confirms the float switch and pump are working.
- Go outside and ensure water is flowing freely from the discharge line.
Annual Check (DIY or Pro):
- Do everything in the quarterly check.
- Unplug and remove the pump from the pit.
- Clean the pump's intake screen thoroughly.
- Clean the entire pit of any sediment and sludge that has accumulated at the bottom.
- Inspect the check valve to ensure it's functioning correctly.
- If you have a battery backup system, test the battery and replace it according to the manufacturer's recommendation (typically every 3-5 years).
Many homeowners hire a plumber for an annual "sump pump tune-up," which costs around $100-$200. This is a wise investment, especially if your basement is finished or used for storage.
Upgrading Your System for Ultimate Peace of Mind
If you live in an area with a high water table or frequent power outages, a basic sump pump system might not be enough. Here are the most common upgrades plumbers recommend to homeowners for a truly resilient system.
Battery Backup Sump Pumps: The #1 Upgrade
This is the single most important upgrade you can make. A battery backup system consists of a second, smaller pump that runs on a 12-volt deep-cycle marine battery. It's installed in the same pit as your primary pump. If the power goes out, the backup system automatically takes over. It can also kick in if the primary pump fails for any other reason or if it simply can't keep up with a massive influx of water.
A professionally installed battery backup system typically costs $800 - $1,800, including the pump, battery, and labor. While not cheap, it's far less than the cost of a basement flood.
Smart Pumps and Water Alarms
For even more protection, consider a "smart" sump pump or a Wi-Fi-enabled water alarm. These devices connect to your home's Wi-Fi and will send an alert directly to your smartphone if the pump loses power, the battery is low, or high water is detected. This gives you a critical early warning, especially if you're away from home.
Choosing the Right Size and Power
Sump pumps are rated by horsepower (HP), typically 1/3 HP, 1/2 HP, or 3/4 HP. Bigger isn't always better. A pump that is too powerful for your needs will "short cycle"—turning on and off too frequently—which wears out the motor prematurely. A pump that's too weak will be overwhelmed.
A professional plumber will assess your situation—the size of your drainage area, the local water table, the height the water needs to be pumped—to recommend the correct size. This is a crucial conversation to have when replacing a pump.
Hiring a Pro: Finding the Right Plumber and Asking the Right Questions
When your basement is at risk, you need a reliable professional. Here’s how to hire well.
Who to Hire: Plumber vs. Basement Waterproofer
For a straightforward sump pump repair or replacement, a licensed plumber is your best bet. They handle pumps, pipes, and valves every day. If your problem is more complex—your foundation is leaking, you have chronic water issues, or you need a full drainage system (like a French drain) installed—you may need a specialized basement waterproofing contractor.
Always verify that any pro you hire is licensed (where required by your state) and carries both general liability and worker's compensation insurance.
Key Questions for Your Potential Pro
Don't just get a price; get an explanation. A good pro will be happy to educate you.
- "Based on my home, what size (HP) and type (submersible vs. pedestal) of pump do you recommend, and why?"
- "Are you just replacing the pump, or will you also clean the pit and inspect the discharge line?"
- "What is the warranty on the pump itself, and what is the warranty on your labor?"
- "Can you provide a separate quote for adding a battery backup system?"
- "What is the total installed cost, including all parts, labor, and disposal of the old pump?"
Expect a standard sump pump replacement to cost between $500 and $1,200, depending on the quality of the pump and the complexity of the job. A high-end system with a powerful pump and battery backup could be $2,000 or more. It's a significant investment, but one that protects the value and safety of your entire home.
Frequently asked questions
How long should a sump pump last?+
A quality, professionally installed sump pump typically lasts about 7 to 10 years. Its lifespan depends on how often it runs, the quality of the pump, and whether it receives regular maintenance. If your pump is approaching the 10-year mark, it's wise to consider a proactive replacement.
Is a battery backup system really necessary?+
If your basement is finished, used for storage, or you live in an area with frequent power outages, a battery backup is highly recommended. The most common time for a sump pump to be needed is during a severe storm, which is also the most common time for a power outage. A backup system provides critical protection when you need it most.
How much does it cost to replace a sump pump?+
The cost to have a plumber replace a sump pump typically ranges from $500 to $1,200. This depends on the pump's horsepower and features, your location, and the complexity of the installation. A simple swap-out will be less expensive than a job requiring pipe modifications.
Can I replace a sump pump myself?+
If you are comfortable with basic plumbing and electrical work, replacing a sump pump can be a DIY project. However, it involves working with water and electricity, so safety is paramount. If you are unsure, hiring a licensed plumber ensures the job is done correctly and safely.
What's that 'thump' or 'gurgle' sound my pump makes?+
A loud 'thump' when the pump shuts off is often the sound of the check valve closing, which is normal but can be loud. If it's very loud, it might be a sign of a 'water hammer' effect, and a plumber might install a 'quiet' check valve. Gurgling can indicate a partial clog or venting issue in the discharge line and is worth having a pro investigate.